Sign In
Upload
Manuals
Brands
Sharp Manuals
All in One Printer
ARM207E - B/W Laser - All-in-One
Sharp ARM207E - B/W Laser - All-in-One Manuals
Manuals and User Guides for Sharp ARM207E - B/W Laser - All-in-One. We have
4
Sharp ARM207E - B/W Laser - All-in-One manuals available for free PDF download: Operation Manual, Quick Reference Manual, Brochure & Specs, Specification Sheet
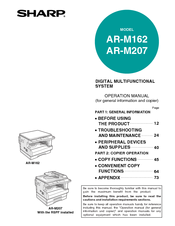
Sharp ARM207E - B/W Laser - All-in-One Operation Manual (372 pages)
DIGITAL MULTIFUNCTIONAL SYSTEM
Brand:
Sharp
| Category:
All in One Printer
| Size: 6.66 MB
Table of Contents
Table of Contents
6
And Maintenance
1
And Supplies
1
Peripheral Devices
1
The Product
1
Part 1: General Information
3
Product Configurations
5
Table of Contents
6
Cautions
8
Cautions on Using
8
Laser Information
9
Installation Requirements
10
Environmental Information
10
Manuals Provided with the Product
11
Main Features
12
Before Using the Product
14
Part Names and Functions
14
Operation Panel
16
Operation in Copy, Print, Scan, and Fax Modes
18
Power on
19
Power off
19
Power Save Modes
19
P
20
Loading Paper
20
Paper
20
Loading Paper
21
Loading Paper in the Bypass Tray
22
Changing the Paper Size Setting of a Tray
23
Disabling (Enabling) Auto Tray Switching
24
Number of Accounts in Auditing Mode
25
Using Auditing Mode
25
Troubleshooting and 2
26
Troubleshooting Machine/Copying Problems
27
Blank Copies
27
Copies Are too Dark or too Light
27
Machine/Copying Problems
27
Power Is on but Copying Is Not Possible
27
Text Is Not Clear in a Copy
27
The Machine Does Not Operate
27
Paper Misfeed
28
Wrinkles Appear in the Paper or the Image Disappears in Places
28
A Copy Job Stops before It Is Finished
29
A Light in the Room Flickers
29
A Tray's Paper Size Setting Cannot be Set
29
Copies Are Smudged or Dirty
29
Of the Original
29
Scanning of the Original Stops before It Is Completed
29
White or Black Lines Appear on Copies
29
Indicators and Display Messages
30
Removing Misfeeds
31
Original Misfeed in the Spf
31
Misfeed in the Bypass Tray
32
Misfeed in the Machine
33
Side Cover
33
Misfeed in Tray 1
35
Misfeed in Tray 2
36
Replacing the Toner Cartridge
37
Checking the Total Output Count
38
Cleaning the Machine
39
Cleaning the Document Glass and
39
Cleaning the Bypass Tray Paper Feed
39
Spf/Document Cover
39
Roller
39
Cleaning the Transfer Charger
40
Adjusting the Display Contrast
41
Peripheral Devices and Supplies
42
Optional Equipment
42
Reversing Single Pass Feeder / Single Pass Feeder
43
250-Sheet Paper Feed Unit / 2 X 250-Sheet Paper Feed Unit
43
Dual Function Board
44
Storage of Supplies
44
Proper Storage
44
Part 2: Copier Operation
45
Copy Functions
47
Normal Copying
47
Set the Number of Copies
48
Auto Paper Select Mode
49
Removing the Document Cover
49
Making a Copy Darker or Lighter
50
Selecting the Tray
51
Setting the Number of Copies
51
Auto Tray Switching
51
Selecting the Original Size
52
Using the Bypass Tray to Copy Aspecial Size Original
53
Reducing or Enlarging a Copy
54
Automatic Ratio Selection
54
Manual Ratio Selection (Preset Copy Ratios/Zoom)
54
SELECTING the VERTICAL and HORIZONTAL COPY RATIOS SEPARATELY (XY Zoom Copying)
56
Two-Sided Copying
58
Two-Sided Copying of One-Sided Originals
59
Copying from the Document Glass
60
Two-Sided Copies of Two-Sided Originals (Only When Using the Rspf)
61
One-Sided Copies of Two-Sided Originals (Only When Using the Rspf)
62
Two-Sided Copies Using the Bypass Tray
63
Dual Page Copy
64
INTERRUPTING a COPY RUN (Interrupt Copying)
65
Press the [Interrupt] Key
65
Convenient Copy Functions
66
Sort Mode
66
Offset Function
67
ROTATING the IMAGE 90 DEGREES (Rotation Copy)
66
Copying Multiple Originals Onto a Single
68
CREATING MARGINS WHEN COPYING (Margin Shift)
70
ERASING SHADOWS AROUND the EDGES of a COPY (Erase Copy)
71
Card Shot
73
Document Glass
74
Specifications
75
Sharp Corporation
92
Operation Manual
93
Introduction
94
Print
96
Basic Printing
96
How [Bypass Tray] and [Bypass Manual] Differ in the "Paper Source" Settings
97
If the Tray Runs out of Paper During Printing
97
Pausing a Print Job
97
When "Paper Source" Is Set to [Auto Select]
97
Opening the Printer Driver from the [Start] Button
98
Printer Driver Settings
99
Printing Multiple Pages on One Page
100
Two-Sided Printing (Only for Models that Support Two-Sided Printing)
100
Fitting the Print Image to the Paper
101
How to Print a Watermark
102
Printing a Watermark
102
Rotating the Print Image 180 Degrees
102
Outline of the Print Status Window
103
Printer Sharing
104
Sharing the Printer Using Windows Networking
104
Shared Printer Settings
105
Client Settings
106
Scan
108
Scanning Overview
108
Scanning from a Twain-Compliant Application
109
Scanner Driver Settings
111
Preview Screen
112
Scanning from a Wia-Compliant Application (Windows Xp)
113
Scanning from the "Scanner and Camera Wizard" (Windows Xp)
114
Scanning Using the Keys on the Machine
116
Button Manager
117
Button Manager Settings
118
Key Operator Programs
119
Key Operator Program List
119
Using the Key Operator Programs
120
Troubleshooting
121
Printing Problems
121
Scanning Problems
123
Specifications
125
Scanner Specifications
126
Before Using
128
Connecting an Extension Phone
130
Transmission Using F-Codes
131
To Use this Product Correctly Asa Facsimile
133
Before Using the Fax Function
133
Power Switch
133
Lithium Battery
134
Installation
135
Important Safety Information
135
Notice for Users in Australia and New Zealand
135
Preparations
136
Points to Check and Program after Installation
136
Set the Date and Time
136
Part Names and Functions
137
Operation Panel
137
Fax Mode (Base Screen)
139
Auditing Mode
140
Originals
141
Originals that Can be Faxed
141
Original Sizes
141
Placing the Original
142
Using the Spf
142
Using the Document Glass
142
Checking the Size of a Placed Original
143
Manually Setting the Scanning Size
143
Selecting Resolution and Exposure Settings
144
Basic Operations
146
Sending a Fax
147
Basic Procedure for Sending Faxes
147
Transmission by Auto-Dialling
149
Sending a Fax by Speed Dialling
149
Dialling and Group Dialling)
149
Searching for a Programmed Destination
150
Using the [Address] Key
150
Faxing a Two-Sided Original
151
Storing Transmission Jobs (Memory Transmission)
153
If a Transmission Error Occurs
154
Image Rotation
154
Faxes, Sending and Receiving
155
Cancelling a Fax Transmission
155
Cancelling a Stored Transmission Job
156
Receiving Faxes
157
Receiving a Fax
157
Transmission
157
Line Status Indicator
157
Fax Print Hold Function
159
Advanced Transmission
161
Using Broadcast Transmission
162
Setting up a Timer Transmission
163
Transmission and Reception Using the Polling Function
165
Polling Memory
165
Using the Polling Function
166
Serial Polling
167
Using Polling Memory
168
Dual Page Scan
172
Using a Program
174
Forwarding Function
175
Using the Forwarding Function
175
F-Code Polling Memory
179
How F-Code Polling Memory Works
179
Using F-Code Polling Memory
180
Procedure for F-Code Polling
182
F-Code Confidential Transmission
184
F-Code Transmission (F-Code Confidential Transmission)
184
Printing a Document Received to an F-Code Confidential Memory Box
186
F-Code Relay Broadcast Transmission
187
USING the F-CODE RELAY BROADCAST FUNCTION (Your Machine Is the Relay Machine)
188
USING the F-CODE RELAY REQUEST FUNCTION (Your Machine Requests a Relay Broadcast)
188
Convenient Methods of Use
189
Connecting an Extension Phone
189
Using an Extension Phone
189
Setting the Reception Mode
190
Programming
191
Storing, Editing, and Deleting Auto Dial Numbers and Programs
191
Storing, Editing, and Deleting Auto-Dial Numbers (Rapid Keys, Speed Dial Numbers, and Group Keys)
191
F-Code Settings
193
Storing, Editing and Deleting Programs
201
Programming, Editing, and Deleting F-Code Memory Boxes
203
Programming an F-Code Memory Box
203
Printing Lists of Programmed Information, Settings, and Communication Activity
210
Entering Characters
211
Characters that Can be Entered
211
Changing to Entry Mode
211
Character Entry Keys
212
Initial Procedure for Entering Characters
213
Entering Symbols
213
Entering Special Characters
214
Troubleshooting
215
When a Transaction Report Is Printed
215
Information Appearing in the Type/Note Column
215
VIEWING the COMMUNICATION ACTIVITY REPORT at REGULAR INTERVALS (Communication Activity Report)
217
When an Alarm Sounds and Awarning Message Is Displayed
217
Self-Diagnostic Function
218
Messages During Normal Operation
218
Problems and Solutions
219
8 Key Operator Programs
221
Key Operator Program List
221
Key Operator Program Menu
222
Procedure for Using the Key Operator Programs
223
Initial Procedure
223
Key Operator Programs for the Fax Function
224
List Print/Set
224
List Setting
224
Initial Setting
225
Pause Time
225
Speaker Volume
226
Distinctive Ring
227
Account Control
227
Remote Reception
227
Account # Set
227
Auto Summer Time Setting
228
Date & Time Set
228
Auto Reduce Tx
229
Disable Fax Print Hold
229
Rotate Tx
229
Sending Function
229
Res. Con. Set
229
Q
230
Send Mode
230
Quick on Line Tx
230
Recall Setting (Busy)
231
Ring Timeout in Auto Tx
232
Rcv. Function
232
Fax Reception Light
232
Auto Cover Sheet
232
Tray Selection
233
Of Rings At. Rx
233
Received Data Print Condition
233
Auto Rcv Reduce to Regular Size
233
Duplex Reception
234
Received Data Fw. Station Set
234
Fw. Rx Data
234
Index Print
235
Anti Junk Fax
235
Enter Junk Fax
235
Earlier Output
235
Polling Security
236
Polling Passcode # Mode
236
Appendix
237
Specifications
237
Index
238
Symbols / Numbers
238
Table of Contents
239
Section 7
244
Introduction
245
Before Using the Network Scanner Function
247
About the Network Scanner Function
247
Settings and Programming Required for the Network Scanner Feature
248
How to Access the Web Page and View Help
248
About the Web Page (for Users)
249
Storing Destinations
250
Storing Destinations for Scan to Ftp
251
Editing and Deleting Programmed Transmission Destinations
254
About the Web Page (for the Administrator)
255
Basic Settings for Network Scanning
256
Various Server Settings
257
PROTECTING INFORMATION PROGRAMMED in the WEB PAGE ([Passwords])
258
How to Use the Network Scanner Function
259
A Look at the Machine
260
Operation Panel
260
Scan Mode (Base Screen)
262
Auditing Mode
263
Sending an Image
264
Basic Transmission Procedure
264
Address Book
266
Selecting a Destination (Using the [Address] Key)
266
Transmitting a Two-Sided Original
269
Checking the Size of a Placed Original
270
Storing Scanning Settings
270
Manually Setting the Scanning Size
270
Selecting the Color Mode
271
Selecting the Resolution
271
Selecting the File Format
272
Adjusting the Threshold Value
273
Setting the Light Source Color
273
Enabling Scanning Margins (Void Area)
274
Entering Characters
275
Image Orientation and Standard Original Placement Orientation
275
Key Operator Programs
276
Key Operator Program List
276
Using the Key Operator Programs
277
Troubleshooting
278
Maximum Resolution
279
Display Messages
279
If Your E-Mail Is Returned
279
Important Points When Using Scan to E-Mail
280
Checking the Ip Address
281
Specifications
282
Section 8
284
Introduction
285
Printing from Windows
287
Basic Printing
287
How [Bypass Tray] and [Bypass Manual] Differ in the "Paper Source" Settings
288
If the Tray Runs out of Paper During Printing
288
Pausing a Print Job
288
When "Paper Source" Is Set to [Auto Select]
288
Auditing Mode
289
Opening the Printer Driver from the [Start] Button
290
Printer Driver Settings
291
Two-Sided Printing (Only for Models that Support Two-Sided Printing)
292
Pamphlet Style
293
Printing Multiple Pages on One Page
294
Fitting the Print Image to the Paper
295
Printing a Watermark
296
Rotating the Print Image 180 Degrees
296
Printing Text and Lines in Black
297
Printer Utilities (Windows)
298
Printer Utilities
298
Before Using the Printer Status Monitor
298
Using the Printer Utilities
299
Changing the Printer Status Monitor Settings
299
Starting up the Printer Utilities
299
Checking the Printer Status
300
Printing from a Macintosh
301
Basic Printing
301
If the Tray Runs out of Paper During Printing
302
Pausing a Print Job
302
How [Bypass Tray] and [Bypass Manual] Differ in the [Paper Feed] Settings
303
Job Control Function (Mac os 8.6 to 9.2.2, Mac os X V10.2 to 10.3.4)
303
When [Paper Feed] Is Set to [Auto Select]
303
Web Functions of the Machine
304
How to Access the Web Page and View Help
304
About the Web Pages (for Users)
305
Directly Printing a File on Acomputer
306
Configuring the Printer Condition Settings
307
Printer Default Settings
307
Printer Condition Settings
308
About the Web Pages (for the Administrator)
309
Protecting Information Programmed in the Web Page ([Passwords])
310
E-Mail Print Function
311
Configuring a Setting in the Key Operator Programs
312
Information Setup
313
Smtp Setup
313
Alerts Message Setup
314
Status Message Setup
314
Key Operator Programs
315
Settings
315
Key Operator Program List
315
Using the Key Operator Programs
316
Basic Procedure for Configuring Settings
316
Ip Address Settings
317
Special Settings
317
Troubleshooting
318
Network Connection Problems
318
Problems During Printing
319
Checking the Ip Address
321
Specifications
322
Printer Specifications
322
Printer Driver Specifications
323
Software Setup Guide
325
Setup Guide
325
Introduction
327
Software License
327
For Windows
328
About the CD-Roms
328
Table of Contents
331
Contents
331
Before Installation
333
Hardware and Software Requirements
333
Installation Environment and Useable Software
333
Installing the Software (that Accompanies the Machine)
333
Installing the Software
333
Installation Using the Installer
333
Installation Method 1
333
Installation Method 2
333
Installation Method 3
333
Installation Method 4
333
Installation of the Printer Driver
337
Using the Machine as a Shared Printer Via Aserver
342
Setting up Button Manager
344
Windows Xp
344
Windows 98/Me/2000
345
Installing the Software
346
(For Options)
346
About Network Environments
346
Installing the Software (for Options)
346
Installation for a Network Connection
346
Setup in a Windows Environment
347
Setting the Ip Address of the Machine
347
Hardware and Software Requirements
347
Installing the Software
350
Installing the Printer Driver (Standard Installation)
350
Custom Installation
352
Using the Machine as a Shared Printer Via Aserver
354
Installing the Ps Display Fonts
356
Using the Ppd File
357
Installing the Resident Font Information (Only When the PPD File Is Installed in Windows 95/98/Me)
357
Installing the Ppd File
358
Installation in Mac os X
358
Installation in Mac os 8.6 to 9.2.2
360
Installing the Screen Fonts (Mac os 8.6 - 9.2.2)
360
Setup in a Macintosh Environment
358
Hardware and Software Requirements
358
Appletalk Settings
358
Configuring the Printer Driver
361
Mac os X V10.2 to 10.3.4
361
MAC os X V10.1.5
363
Mac os 8.6 to 9.2.2
364
Troubleshooting and Useful Information
365
Troubleshooting
365
Removing the Software
365
Troubleshooting and Useful Information
366
Configuring the Printer Driver
368
Installing Acrobat Reader
368
Checking the Ip Address
369
Hardware and Software Requirements
369
Connecting to a Computer
370
Connecting a Usb Cable
370
Advertisement
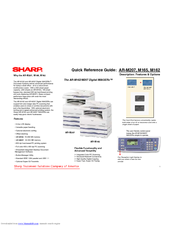
Sharp ARM207E - B/W Laser - All-in-One Quick Reference Manual (44 pages)
Digital IMAGERs
Brand:
Sharp
| Category:
All in One Printer
| Size: 1.78 MB
Table of Contents
Specifications
7
External Views and Internal Structures
12
Operation Panel
16
Trouble Codes
24
Maintenance
25
Key Operator Program
28
Flash ROM Version up Procedure
30
Sharp ARM207E - B/W Laser - All-in-One Brochure & Specs (6 pages)
AR-M162E | AR-M207E Brochure
Brand:
Sharp
| Category:
All in One Printer
| Size: 2.23 MB
Advertisement
Sharp ARM207E - B/W Laser - All-in-One Specification Sheet (2 pages)
AR-M162E | AR-M207E Specification Sheet
Brand:
Sharp
| Category:
All in One Printer
| Size: 0.18 MB
Advertisement
Related Products
Sharp AR-M205
Sharp AR-M207
Sharp AR M207 - B/W Laser - All-in-One
Sharp AR-M237 IMAGERs
Sharp AR-M236
Sharp AR-M276
Sharp AR-M280N Imager
Sharp AR-M280U Imager
Sharp AR-M230 Series
Sharp AR M277 - B/W Laser - Copier
Sharp Categories
Microwave Oven
LCD TV
TV
Stereo System
All in One Printer
More Sharp Manuals
Login
Sign In
OR
Sign in with Facebook
Sign in with Google
Upload manual
Upload from disk
Upload from URL