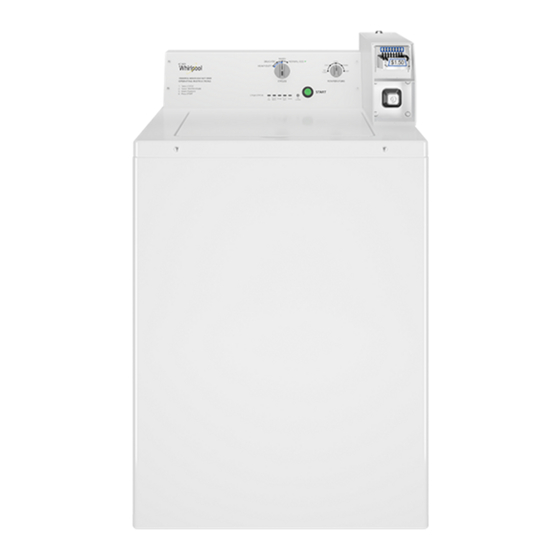
Table of Contents
Advertisement
Quick Links
TABLE OF CONTENTS
Washer Safety .......................................................................... 2
Tools & Parts ............................................................................ 3
Dimensions .............................................................................. 4
Location Requirements ........................................................... 5
Drain System ............................................................................ 6
Electrical Requirements.......................................................... 7
Installation Instructions .......................................................... 8
Connect Drain Hose ................................................................ 9
Connect Inlet Hoses .............................................................. 10
Level Washer .......................................................................... 11
Installing Coin Slide and Coin Box ....................................... 11
Complete Installation ............................................................ 12
Typical Full Load Sizes .......................................................... 12
Washer Maintenance............................................................. 13
If You Need Assistance ......................................................... 14
Alternate Parts & Accessories ............................................. 14
Warranty ................................................................................. 15
W10889132A
W10889135A - SP
INSTALLATION
INSTRUCTIONS
Commercial Washer
INSTRUCTIONS
D'INSTALLATION
Laveuse commerciale
TABLE DES MATIÈRES
Page
Sécurité de la laveuse ........................................................... 16
Outillage et pièces ................................................................. 17
Dimensions ............................................................................ 18
Exigences d'emplacement ................................................... 19
Système de vidange .............................................................. 20
Spécifications électriques .................................................... 21
Instructions d'installation ..................................................... 22
Raccordement du tuyau de vidange .................................... 23
Raccordement des tuyaux d'arrivée d'eau ......................... 24
Établissement de l'aplomb de la laveuse ............................ 25
Installation de la glissière et de la boîte à monnaie ........... 25
Achever l'installation ............................................................. 26
Taille typique des charges complètes ................................. 26
Entretien de la laveuse .......................................................... 27
Si vous avez besoin d'assistance ........................................ 28
Pièces supplémentaires et accessoires .............................. 28
Garantie .................................................................................. 32
www.whirlpoolcommerciallaundry.com
Page
Advertisement
Table of Contents

Summary of Contents for Whirlpool CAE2765FQ0
-
Page 1: Table Of Contents
INSTALLATION INSTRUCTIONS Commercial Washer INSTRUCTIONS D’INSTALLATION Laveuse commerciale TABLE OF CONTENTS TABLE DES MATIÈRES Page Page Washer Safety ................2 Sécurité de la laveuse ............16 Tools & Parts ................3 Outillage et pièces ..............17 Dimensions ................4 Dimensions ................18 Location Requirements ............ -
Page 2: Washer Safety
WASHER SAFETY... -
Page 3: Tools & Parts
TOOLS & PARTS Tools Needed: Level Pliers Utility Knife 9/16" (14 mm) Flat-Blade Screwdriver Open-End Wrench Optional tools: Flashlight Bucket Parts Supplied: Water Inlet Hoses (2) Inlet Hose Washers (4) Drain Hose with Clamp, U-Form, and Cable Tie... -
Page 4: Dimensions
DIMENSIONS Front View Side View 27" (686 mm) " (210 mm) " " (1.080 m) (921 mm) 1" (25 mm) Back View 16" (406 mm) " (267 mm) " (140 mm) " (1.130 m) " (946 mm) " (933 mm) "... -
Page 5: Location Requirements
LOCATION REQUIREMENTS Selecting the proper location for your washer improves Recessed Area or Closet Installation performance and minimizes noise and possible washer “walk.” This washer may be installed in a recessed area or closet. Your washer can be installed in a basement, laundry room, or The installation dimensions shown are the minimum spaces recessed area. -
Page 6: Drain System
DRAIN SYSTEM Floor drain system Drain system can be installed using a floor drain, wall standpipe, floor standpipe, or laundry tub. Select the method you need. Floor standpipe drain system 39" (990 mm) 8" (203 mm) Floor drain system requires a Siphon Break Kit (Part Number 285320). -
Page 7: Electrical Requirements
ELECTRICAL REQUIREMENTS A 120-volt, 60 Hz., AC-only, 15- or 20-amp, fused electrical supply is required. A time-delay fuse or circuit breaker is recommended. It is recommended that a separate circuit breaker serving only this appliance be provided. This washer is equipped with a power supply cord having a 3 prong grounding plug. -
Page 8: Installation Instructions
INSTALLATION INSTRUCTIONS 3. Remove tape from washer lid, open lid, and remove cardboard packing tray from tub. Be sure to remove all parts from tray. NOTE: Keep tray in case you need to move washer later. It is necessary to remove all shipping materials for proper operation and to avoid excessive noise from washer. -
Page 9: Connect Drain Hose
CONNECT DRAIN HOSE Proper routing of the drain hose avoids damage to your floor 5. Place hose into standpipe (shown in picture) or over side due to water leakage. of laundry tub. Remove drain hose from the washer basket IMPORTANT: D rain hose is not to exceed 8"... -
Page 10: Connect Inlet Hoses
CONNECT INLET HOSES Connect Inlet Hoses to Washer Insert new hose washers (supplied) into each end of the inlet hoses. Firmly seat the washers in the couplings. 1. Attach cold water hose to cold water inlet valve marked with a blue ring. Screw coupling by hand until it is snug. Washer Coupling Connect Inlet Hoses to Water Faucets... -
Page 11: Level Washer
LEVEL WASHER IMPORTANT: Level washer properly to reduce excess noise HELPFUL TIP: You may want to prop up front of washer about and vibration. 4" (102 mm) with a wood block or similar object that will support weight of washer. Jam nut Jam nut 1. -
Page 12: Complete Installation
COMPLETE INSTALLATION Check that you have all of your tools. Check that shipping materials were completely removed from washer. Dispose of/recycle all packaging materials. Check that the water faucets are on. Check for leaks around faucets and inlet hoses. Remove film from console and any tape remaining on washer. -
Page 13: Washer Maintenance
WASHER MAINTENANCE Transporting Your Washer Operating Tips Shut off both water faucets. Disconnect and drain water inlet hoses. Disconnect drain from drain system and drain any remaining water into a pan or bucket. Disconnect drain hose from back of washer. Unplug power cord. -
Page 14: If You Need Assistance
W10575888 Accessories Washer Drip Trays Part Number 8212526 Fabric Softener Dispenser Kit Part Number 63594 Drain beyond reach of 4 ft. (1.2 m) Drain Hose Extension drain hose Part Number DRNEXT4 Whirlpool Corporation, Benton Harbor, Michigan 49022, U.S.A. -
Page 15: Warranty
DISCLAIMER OF REPRESENTATIONS OUTSIDE OF WARRANTY Whirlpool makes no representations about the quality, durability, or need for service or repair of this major appliance other than the representations contained in this Warranty. If you want a longer or more comprehensive warranty than the limited warranty that comes with this major appliance, you should ask Whirlpool or your retailer about buying an extended warranty.


