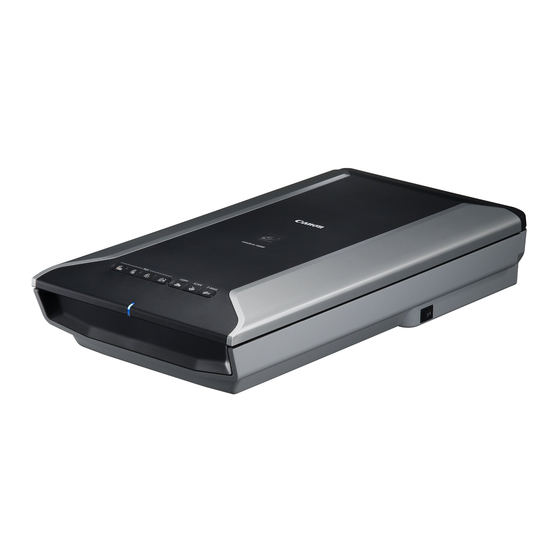
Canon CanoScan 5600F Quick Start Manual
Canon canoscan 5600f: quick start
Hide thumbs
Also See for CanoScan 5600F:
- Quick start manual (59 pages) ,
- Brochure (10 pages) ,
- Service information (9 pages)
Advertisement
Quick Start Guide
Quick Start Guide
Please read this guide before operating this scanner. After you finish reading this guide,
store it in a safe place for future reference.
Package Contents............................... 1
Installing the Software......................... 2
Preparing the Scanner ........................ 4
Try Scanning....................................... 5
Using the Scanner Buttons ................. 6
Table of Contents
Scanning with MP Navigator EX......... 7
Scanning Film ..................................... 8
Specifications...................................... 11
Safety Precautions.............................. 12
Advertisement
Table of Contents

Summary of Contents for Canon CanoScan 5600F
-
Page 1: Table Of Contents
Quick Start Guide Quick Start Guide Please read this guide before operating this scanner. After you finish reading this guide, store it in a safe place for future reference. Package Contents... 1 Installing the Software... 2 Preparing the Scanner ... 4 Try Scanning... - Page 2 Do not make any changes or modifications to the equipment unless otherwise specified in the manual. If such changes or modifications should be made, you could be required to stop operation of the equipment. Canon U.S.A., Inc. One Canon Plaza...
-
Page 3: Package Contents
Documentation • Quick Start Guide (this document) • Additional Documents Setup CD-ROM • Software Programs - ScanGear (scanner driver) - MP Navigator EX (utility software) - Solution Menu (menu panel software) - ArcSoft PhotoStudio (image editing software) • On-screen Manuals... -
Page 4: Installing The Software
Installing the Software Installing the Software • Do NOT connect the scanner to a computer before installing the software. If you connect the scanner and the Found New Hardware screen appears, unplug the USB cable from the computer and click [Cancel]. The screen may close automatically when the USB cable is unplugged. - Page 5 Click [Install] to start installation. Carefully read the License Agreement, and then click [Yes] to proceed. Follow the on-screen instructions to perform the installation. When the User Registration screen appears, follow the on-screen instructions to ensure product support. For Macintosh, skip step 8 and go to step 9. For Windows, when the Extended Survey Program screen appears, confirm it.
-
Page 6: Preparing The Scanner
Open the document cover and slide the lock switch toward the unlock mark ( • Handle the scanner with both hands. Be careful not to drop the scanner. • When you carry or transport the scanner, make sure to slide the lock switch toward the lock mark ( ) to fasten the scanning unit. -
Page 7: Try Scanning
Start MP Navigator EX. For Windows: Double-click the [Canon Solution Menu] icon, then click [Scan/import photos or documents.]. For Macintosh: Click the [Solution Menu] icon in the Dock, then click [Scan/import photos or documents.]. -
Page 8: Using The Scanner Buttons
If the scanner buttons do not work properly, see "Troubleshooting" in the Scanning Guide (on-screen manual). • For Mac OS X v.10.3.9: Before using the scanner buttons, you need to set Image Capture (in [Applications] folder) to open MP Navigator EX automatically when a scanner button is pressed. -
Page 9: Scanning With Mp Navigator Ex
Click [Scan/import photos or documents.] in the Solution Menu. You can also start it by following procedure. For Windows: Select [Start] – [(All) Programs] – [Canon Utilities] – [MP Navigator EX 2.0], and click [MP Navigator EX 2.0]. For Macintosh: Open [Applications] – [Canon Utilities] folders, then double-click the [MP Navigator EX 2.0] icon. -
Page 10: Scanning Film
Scanning Film Scanning Film This scanner can scan 35 mm film (film strip or slide). Follow the procedure below when scanning film. Remove the protective sheet from the document cover. Press and hold the levers at the top of the protec-... - Page 11 Align the Film Guide’s tab with the FILM symbol on the document glass of the scanner. Place a slide or slides face down (correctly viewed from below) in the Film Guide as shown in the figure on the right.
- Page 12 Scanning Film Click [Film]. Click [Scan]. Do not move the scanner while it is operating. When the preview is displayed, place a check mark beside the number(s) of the frame(s) you want to scan, and then click [Scan] to start scanning.
-
Page 13: Specifications
The fastest speed in Hi-Speed USB mode on Windows PC. Transfer time is not included. Scanning speed varies according to the document types, scan settings, or specifications of the computer. USB connection to PC • Specifications are subject to change without notice. Model Name: K10319 (CanoScan 5600F) CanoScan 5600F Flatbed CCD 6-line color... -
Page 14: Safety Precautions
• Do not place heavy objects on the scanner. Objects may fall and cause injuries. • Do not push the scanner into a narrow cabinet or put a tablecloth on it or place on a thick rug. If the scanner has heat, it may cause fire or damage. -
Page 15: General Handling Precautions
Do not use flammable liquids such as alcohol, benzene or thinners. If a flammable liquid enters the inner electrical parts or the cables are damaged by plugging/unplugging, fire or electrical shock may result. If anything enters the scanner, immediately unplug the power cord. Then contact your retailer or Canon Customer Support Help Desk. CAUTION •... - Page 16 LAMP(S) INSIDE THIS PRODUCT CONTAIN MERCURY AND MUST BE RECYCLED OR DISPOSED OF ACCORDING TO LOCAL, STATE OR FEDERAL LAWS. As an NERGY meets the NERGY QT5-1576-V01 XXXXXXXX ® Partner, Canon Inc. has determined that this product ® guidelines for energy efficiency. ©CANON INC. 2008 PRINTED IN THAILAND...


