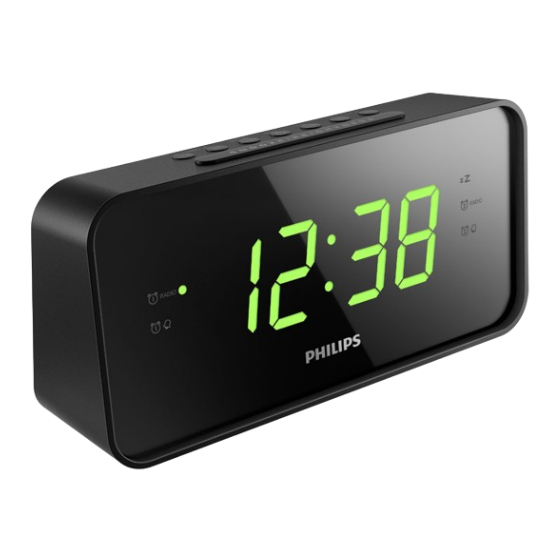
Philips AJ3232 User Manual
Hide thumbs
Also See for AJ3232:
- User manual (16 pages) ,
- Short user manual (2 pages) ,
- Short user manual (2 pages)
Summary of Contents for Philips AJ3232
- Page 1 Always there to help you Register your product and get support at www.philips.com/support AJ3232 Question? Contact Philips User manual...
-
Page 3: Table Of Contents
Contents 1 Important Safety 2 Your clock radio Introduction What's in the box Overview of the clock radio 3 Get started Install battery Connect power Set time Set alarm timer Turn on 4 Listen to radio Tune to radio stations Store radio stations automatically Store radio stations manually Select a preset radio station... -
Page 4: Important
1 Important • Do not block any ventilation openings. Install in accordance with the manufacturer's instructions. • Only use attachments or accessories Safety specified by the manufacturer. • Unplug this radio during lightning storms or when unused for long periods of time. • Refer all servicing to qualified service Know these safety symbols personnel. -
Page 5: Your Clock Radio
2 Your clock radio Congratulations on your purchase, and welcome to Philips! To fully benefit from the support that Philips offers, register your product at www.philips.com/welcome. Introduction With this radio, you can • listen to FM and AM radio; • know the time; and • set two alarms to ring at different time. -
Page 6: Overview Of The Clock Radio
Overview of the clock radio a SNOOZE/BRIGHTNESS • Snooze the alarm. • Adjust display brightness. b HOUR/MIN/- TUNING + • Tune to radio stations. • Set hour and minute. c PRESET/SET TIME • Store radio stations manually. • Select a preset radio station. •... -
Page 7: Get Started
3 Get started Connect power Caution Always follow the instructions in this chapter in • Risk of product damage! Make sure that the power sequence. voltage corresponds to the voltage printed on the back or underside of the radio. • Risk of electric shock! When you unplug the AC cord, Install battery always pull the plug from the socket. -
Page 8: Set Alarm Timer
Press SET TIME again to confirm. » The set time is displayed. • If there is no operation for 10 seconds, the radio exits time setting mode automatically. Set alarm timer You can set two alarms to ring at different time. Note • You can only set the alarm in standby mode. -
Page 9: Turn On
Snooze the alarm When the alarm sounds, press SNOOZE. » The alarm snoozes and repeats ringing nine minutes later. Turn on Press to turn on the radio. » The radio enters FM or AM tuner mode. • If there is no operation for 10 seconds, the clock (if set) is displayed. -
Page 10: Listen To Radio
4 Listen to radio Store radio stations manually Note • You can store a maximum of 20 FM radio stations and 20 AM radio stations. Tune to radio stations Tune to a radio station. Note Press and hold PRESET for two seconds. •... -
Page 11: Other Features
5 Other features Set sleep timer Press SLEEP repeatedly to select a time period (in minutes). » The radio switches to standby mode automatically after the preset period. » When [OFF] (off) is displayed, the sleep timer is deactivated. Adjust brightness Press BRIGHTNESS repeatedly to adjust display brightness. -
Page 12: Product Information
6 Product General information information AC power 240 V ~, 50 Hz Operation Power Consumption Standby Power <1 W Note Consumption Dimensions: - Main Unit 190 x 94 x 62 mm • Product information is subject to change without prior (W x H x D) notice. -
Page 13: Troubleshooting
If you encounter problems when using this device, check the following points before requesting service. If the problem remains unsolved, go to the Philips Web page (www. philips.com/support). When you contact Philips, make sure that the device is nearby and the model number and serial number are available. -
Page 14: Notice
8 Notice Any changes or modifications made to this device that are not expressly approved by Gibson Innovations may void the user’s authority to operate the equipment. Disposal of your old product Your product is designed and manufactured with high quality materials and components, which can be recycled and reused. This symbol on a product means that the product is covered by European Directive 2012/19/EU. - Page 16 This product has been manufactured by, and is sold under the responsibility of Gibson Innovations Ltd., and Gibson Innovations Ltd. is the warrantor in relation to this product. Philips and the Philips Shield Emblem are registered trademarks of Koninklijke Philips N.V. and are used under license from Koninklijke Philips N.V.


